
Hey, sugar! It’s your Auntie Cynthia here, coming to you straight from my cozy Richmond kitchen—where the air always smells like vanilla, and the music is always playing.
Let me tell you a little story. A few years back, during those quiet, uncertain days of the lockdown, I started cooking for my sweet neighbor, Fifi. What started with full meals quickly turned into a passion for creative sweet treats. I discovered that these little bites of happiness were perfect for brightening difficult days and creating moments of joy.
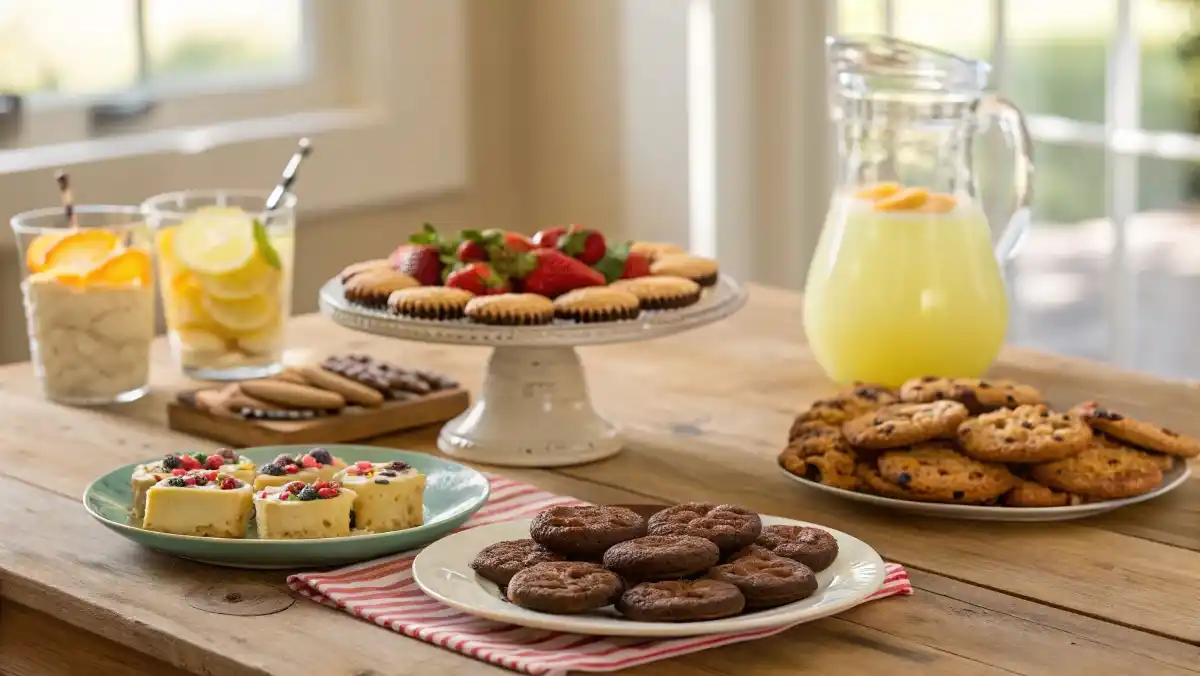
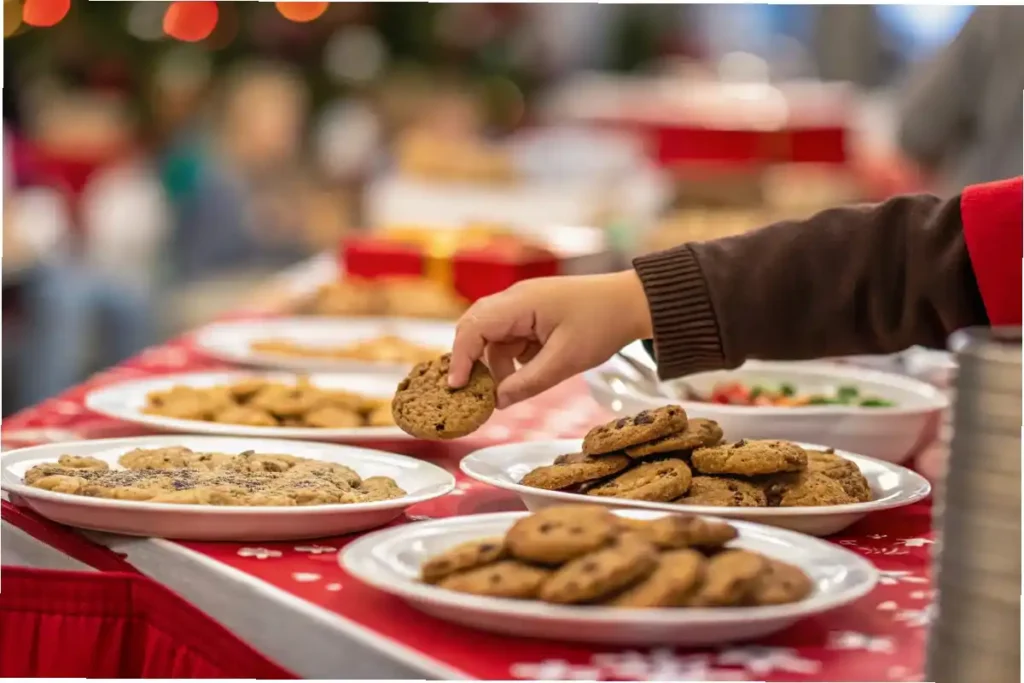
Today, I’m sharing that same philosophy with you. We’re diving into the wonderful world of sweet treats for a party—those delightful morsels that bring smiles and a touch of homemade warmth to any gathering. Whether it’s a birthday bash, a baby shower with a “Love is sweet, please take a treat” theme, or just a Tuesday that needs a little sparkle, I’ve got you covered. So, tie on your apron, and let’s make some magic!
Table of Contents
Why These Sweet Treats Are Special
Now you might be asking, “Auntie, what makes your party sweets so different?” Well, pull up a chair and let me break it down.
- Heartfelt & Authentic: Every recipe comes with a story. It’s more than just instructions—it’s a piece of my heart shared with you, just like I shared with Fifi.
- Effortless Elegance: Delicious doesn’t have to be difficult. These recipes are designed for that “wow” factor without the fuss, so you can spend more time enjoying the party.
- Make-Ahead Friendly: Got 24 hours to prep? Or just 45 minutes? These recipes flex to your timeline so you’re not scrambling at the last minute.
- Kid-Tested, Grown-Up Approved: From my 11-year-old daughter (my chief taste-tester!) to the most discerning adults, these treats bring everyone back for seconds.
The Ingredients / Essential Components
Here’s your shopping list for four of my all-time favorite party pleasers—a perfect mix of classic comfort and healthy fun.
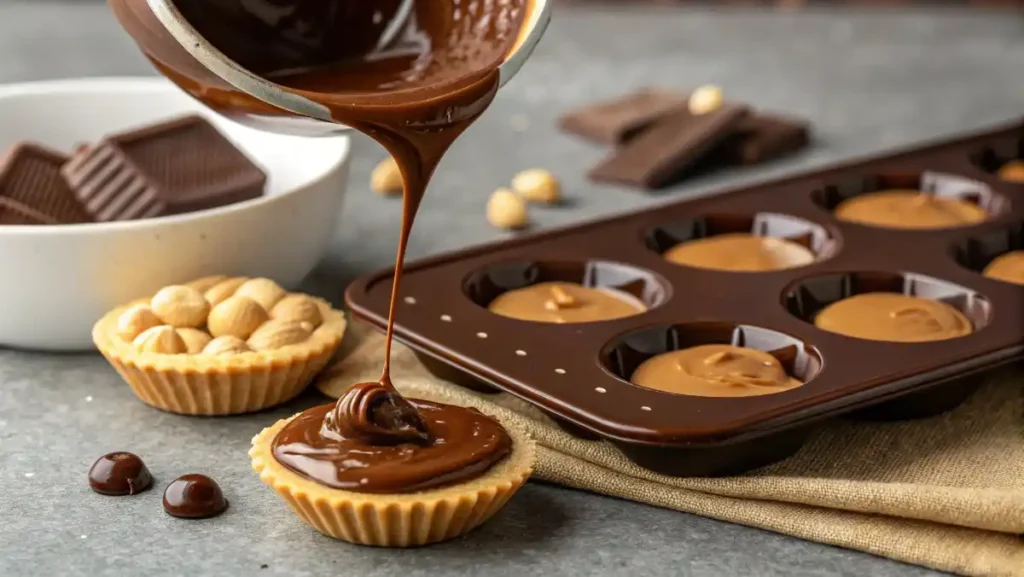
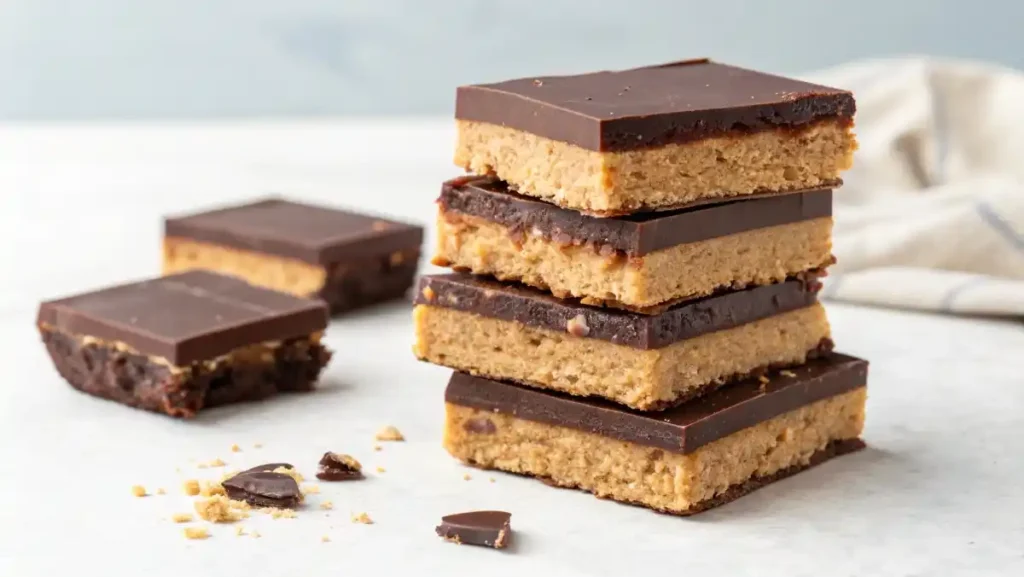
No-Bake Chocolate Peanut Butter Bars
- Graham Cracker Crumbs: 1 ½ cups (180g)
- Creamy Peanut Butter: 1 cup (240g)
- Unsalted Butter or Coconut Oil: ½ cup (113g), melted
- Powdered Sugar: 1 ½ cups (180g)
- Semi-Sweet Chocolate Chips: 1 ½ cups (270g)
- Rich, creamy, and no-bake. A guaranteed hit!
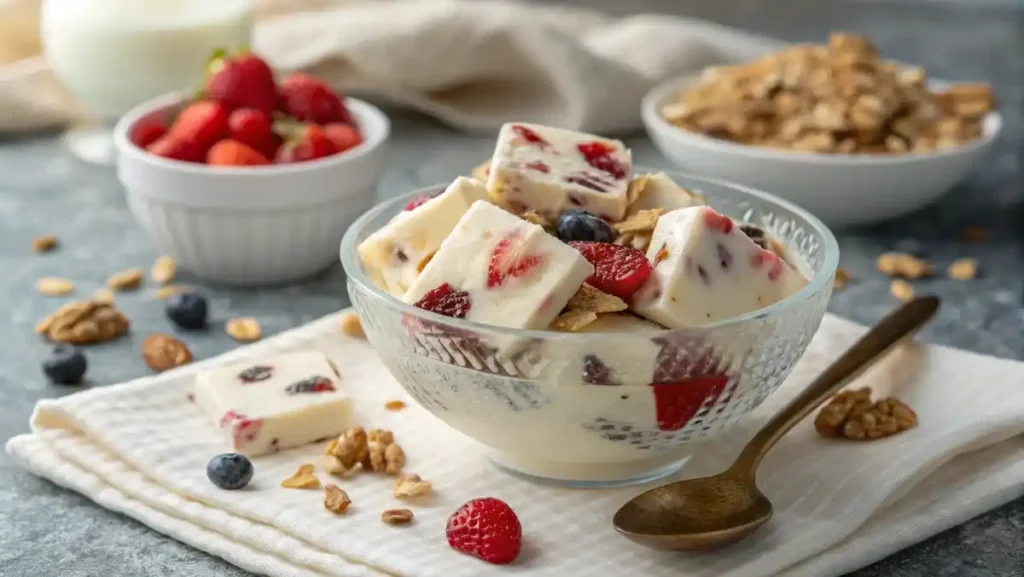
Greek Yogurt Berry Bark (Healthy & Refreshing)
- Plain Greek Yogurt: 2 cups (500g)
- Honey or Maple Syrup: 2-3 tablespoons (30-45ml)
- Mixed Berries: 1 cup (150g), fresh or frozen
- Granola: ¼ cup (25g) for crunch
- Vanilla Extract: 1 teaspoon (5ml)
- A protein-packed treat that looks as good as it tastes.
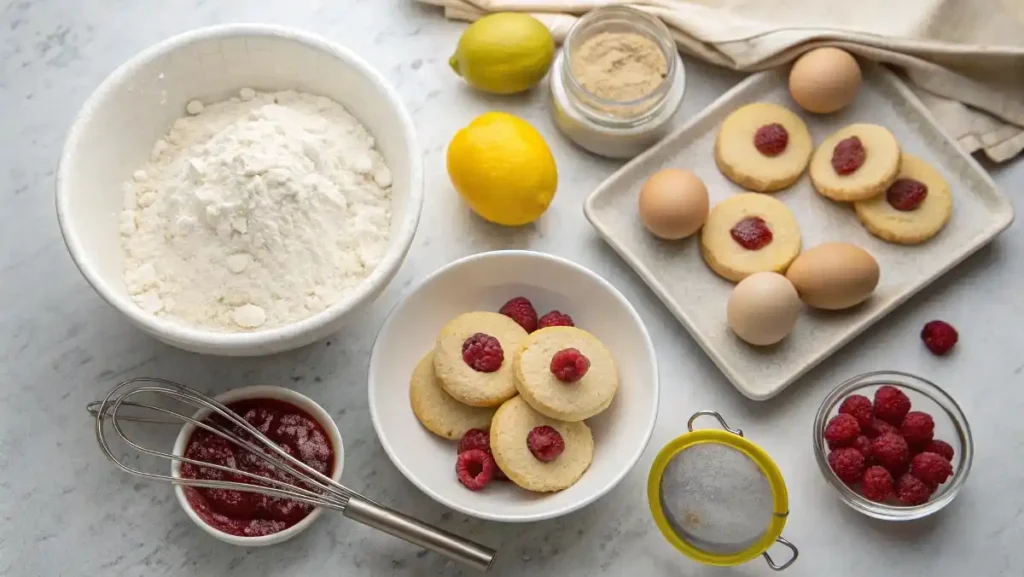
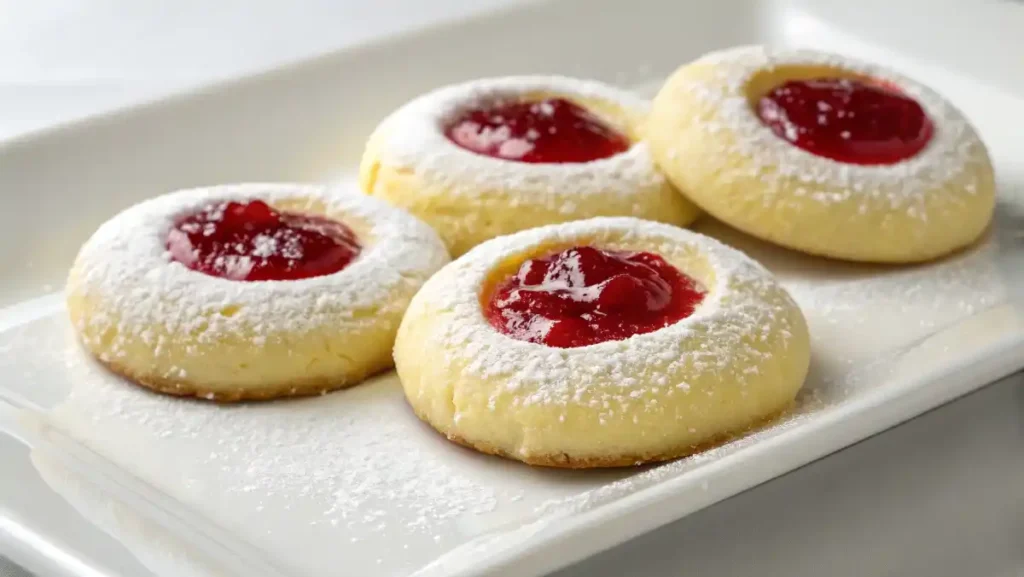
Lemon Raspberry Thumbprint Cookies
- All-Purpose Flour: 2 ¼ cups (270g)
- Unsalted Butter: 1 cup (226g), softened
- Granulated Sugar: ¾ cup (150g)
- Large Egg: 1
- Lemon Zest: 1 tablespoon
- Raspberry Jam: ½ cup (160g)
- Elegant, buttery, and bursting with bright flavor.
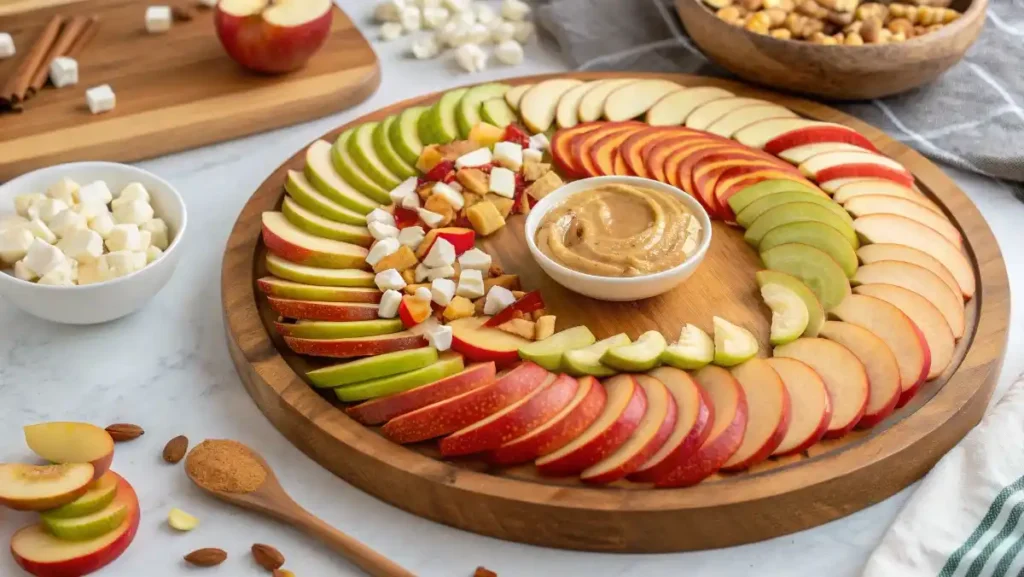
Apple Nachos (Vegan-Friendly & Fun)
- Apples: 2-3, thinly sliced
- Almond or Peanut Butter: ¼ cup (60ml), melted for drizzling
- Mini Chocolate Chips: 2 tablespoons (30g)
- Chopped Nuts or Shredded Coconut: 2 tablespoons
- A beautiful platter of crunchy, creamy fun—with zero baking involved.
The Necessary Equipment
Let’s keep it real: you just need the basics and a good playlist.
- Baking sheets & an 8×8 inch (20×20 cm) pan
- Parchment paper (your best friend!)
- Mixing bowls (medium and large)
- Rubber spatula or wooden spoon
- Electric mixer (optional, but helpful for cookies)
Auntie Cynthia’s Tip: “Line everything with parchment paper. It makes cleanup so easy you’ll feel like you cheated!”
The Path to Perfection: Step-by-Step
Alright, my dears, this is where the magic happens!
No-Bake Chocolate Peanut Butter Bars
My daughter and her friends can devour a whole pan of these. They’re foolproof!
- Make the Base: Mix graham crumbs, powdered sugar, peanut butter, and melted butter in a bowl.
- Press It: Press the mixture firmly into a parchment-lined 8×8-inch pan.
- Melt the Top: Melt chocolate chips in the microwave in 30-second bursts, stirring until smooth. Pour over the base.
- Chill Out: Refrigerate for at least 1-2 hours until firm, then slice into squares.
Greek Yogurt Berry Bark
Perfect for a summer party—it’s so refreshing and disappears in minutes.
- Line a Tray: Line a baking sheet with parchment paper.
- Mix the Yogurt: Stir the Greek yogurt, honey/maple syrup, and vanilla together.
- Spread It: Spread the yogurt evenly on the tray, about ½ inch thick.
- Get Artsy: Top with berries and granola. Freeze for 3-4 hours, then break into beautiful shards.
Lemon Raspberry Thumbprint Cookies
These remind me of my own grandmother’s baking. Pure, simple elegance.
- Preheat & Prep: Preheat oven to 350°F (175°C). Line a baking sheet.
- Cream It: Using a mixer, cream the softened butter and sugar until light and fluffy. Beat in the egg and lemon zest.
- Mix the Dough: Gradually add the flour and a pinch of salt until just combined. Don’t overmix! Chill the dough for 30 minutes.
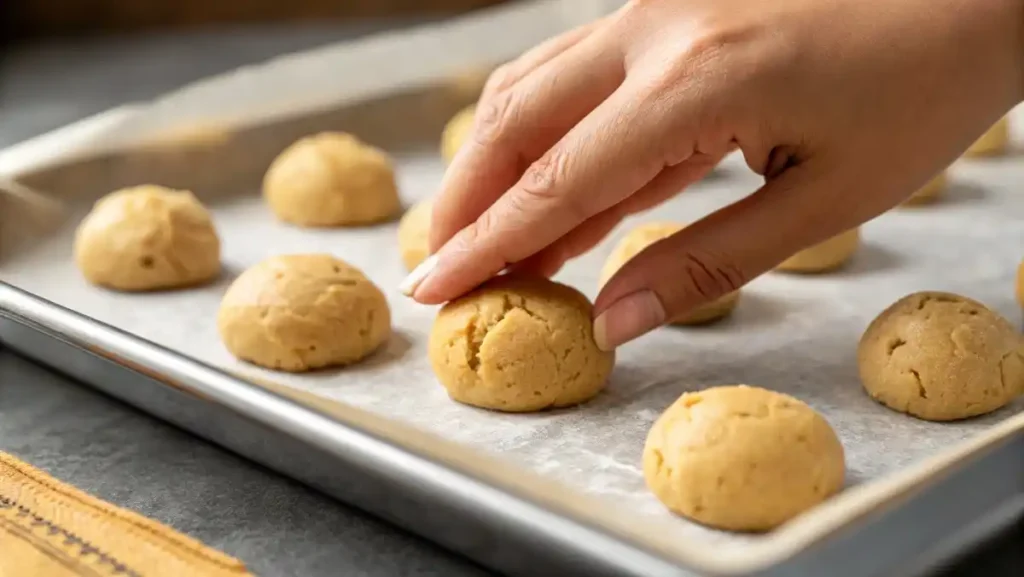
- Shape & Fill: Roll dough into 1-inch balls. Make an indentation in each with your thumb and fill with ½ teaspoon of raspberry jam.
- Bake: Bake for 12-15 minutes, until the edges are lightly golden. Cool completely.
Apple Nachos
The ultimate “I need a dessert in 5 minutes” recipe. It always wows people.
- Arrange the Apples: Arrange your thinly sliced apples on a platter in a beautiful spiral.
- Drizzle It: Warm the nut butter slightly so it’s easy to drizzle. Go wild!
- Sprinkle the Fun: Sprinkle with chocolate chips and nuts or coconut.
- Serve Immediately: This is all about the fresh crunch, so serve it right away!
Secrets to Success: Your Master Tips
- Room Temp is the Secret Handshake: For cookies, using room temperature butter and eggs makes everything creamier and fluffier. It’s a non-negotiable!
- Don’t Overmix the Dough: Once you add flour, mix until just combined. A light hand is the key to tender, melt-in-your-mouth treats.
- Taste As You Go: Especially with no-bake recipes! Does your yogurt need more honey? Does your nut butter need a pinch of salt? You’re the chef!
- Label Everything: At your party, use cute handwritten cards. “No-Bake Peanut Butter Dream Bars” or “Fruity Yogurt Bark.” People eat with their eyes first, sugar.
Variations and Customization
- For the Bars: Swap peanut butter for almond butter. Add crushed pretzels to the base for a salty crunch.
- For the Bark: Use dairy-free yogurt for a vegan twist. Top with chopped kiwi, mango, or a swirl of jam.
- For the Cookies: Use any jam you love—apricot or strawberry are divine. Roll the dough balls in chopped nuts before baking for extra texture.
- For the Nachos: Drizzle with caramel or melted white chocolate. Use sliced pears instead of apples.
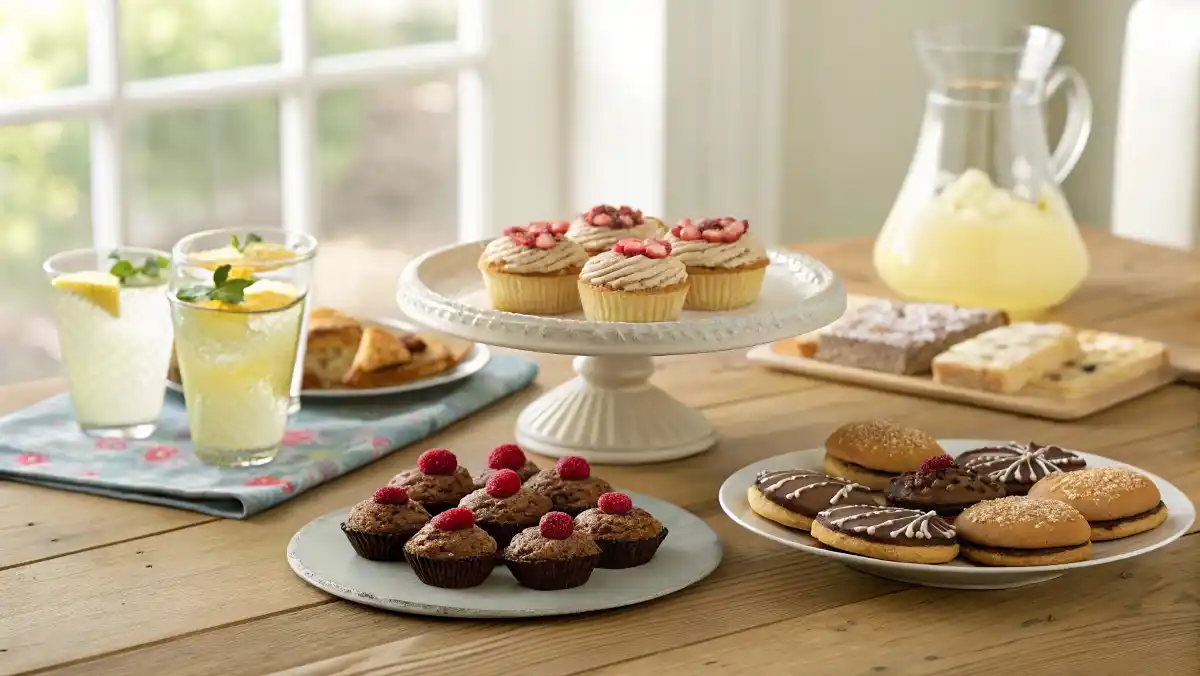
Serving Suggestions
- Bars: Cut into clean squares and serve on a tiered cake stand.
- Bark: Display in a frosty bowl right out of the freezer—gorgeous next to a pitcher of water.
- Cookies: Arrange on a simple white platter to let their colors pop. Perfect with tea or coffee.
- Nachos: Assemble on a rustic wooden board for a stunning centerpiece.
Storage
- No-Bake Bars & Cookies: Store in an airtight container. Bars in the fridge (1 week), cookies at room temp (4 days).
- Yogurt Bark: Must be kept frozen in a sealed bag or container.
- Apple Nachos: Serve immediately—they don’t store well.
A Note on Balance
As Auntie Cynthia, my philosophy is all about enjoying life’s sweet moments in balance. While these are treats, making them at home means you know exactly what’s in them! For those interested in the official guidelines on daily intake, health organizations like the American Heart Association have excellent resources on added sugars. Remember, the key is to savor every bite, mindfully.
Frequently Asked Questions (FAQ)
I often get questions about these sweet treats for a party. Here are some common ones:
What desserts are good for a party?
The best party desserts are easy-to-eat finger foods.
Top Choices: Cookies, brownies, mini cupcakes, no-bake bars, and fruit skewers. They don’t require plates or forks.
Pro-Tip: Offer a mix of flavors, like something chocolatey and something fruity, to please everyone.
How to serve sweets to guests?
Set up a Dessert Station: Arrange all sweets on a separate table.
Use Cake Stands: Varying the height of platters looks better and saves space.
Label Everything: Use small cards to name each dessert. This helps guests with allergies.
Pre-slice Everything: Cut cakes, pies, and bars ahead of time so guests can just grab and go
How many sweet treats per week?
For a healthy balance, most guidelines suggest limiting added sugar. A homemade treat enjoyed mindfully 2-3 times a week is a common approach for many. It’s about moderation, not strict rules.
How many desserts to serve at a party?
For Dinner Parties: 1-2 options are plenty.
For Casual Parties / Potlucks: Offer 3-4 different types for variety.
For “Dessert-Only” Parties: Go for 5-7+ options, since dessert is the main event.
How to have a dessert party?
Offer Variety: Serve a mix of chocolate, fruit, creamy, and crunchy desserts.
Serve Coffee & Tea: These are essential for pairing with sweets.
Add a Savory Snack: A small cheese and cracker board helps balance all the sugar.
How many servings for a party?
For small, bite-sized items (cookies, mini brownies): Plan 3-4 pieces per person.
For larger items (cupcakes, slices of cake): Plan 1.5 pieces per person. (Some will have one, some will have two).
Conclusion
Whether you’re planning a birthday bash or a simple get-together, these sweet treats for a party are your secret weapon. They’re simple, joyful, and full of love—the way all food should be. Remember, the best bites are those shared with the people you love. Now go on and create some sweet memories.
I truly love hearing from you, so please leave a comment below and tell me—which of these treats will you be making for your next celebration?
And don’t forget to save a bite for yourself.

With all my heart,
—Auntie Cynthia
Sweet Treats for a Party
Ingredients
Equipment
Method
- Mix graham crumbs, powdered sugar, peanut butter, and melted butter in a bowl.
- Press the mixture firmly into a parchment-lined 8×8-inch pan.
- Melt chocolate chips in the microwave in 30-second bursts, stirring until smooth. Pour over the base.
- Refrigerate for at least 1-2 hours until firm, then slice into squares.
- Line a baking sheet with parchment paper.
- Stir the Greek yogurt, honey/maple syrup, and vanilla together.
- Spread the yogurt evenly on the tray, about ½ inch thick.
- Top with berries and granola. Freeze for 3-4 hours, then break into beautiful shards.
- Preheat oven to 350°F (175°C). Line a baking sheet.
- Using a mixer, cream the softened butter and sugar until light and fluffy. Beat in the egg and lemon zest.
- Gradually add the flour and a pinch of salt until just combined. Don’t overmix! Chill the dough for 30 minutes.
- Roll dough into 1-inch balls. Make an indentation in each with your thumb and fill with ½ teaspoon of raspberry jam.
- Bake for 12-15 minutes, until the edges are lightly golden. Cool completely.
- Arrange your thinly sliced apples on a platter in a beautiful spiral.
- Warm the nut butter slightly so it’s easy to drizzle. Go wild!
- Sprinkle with chocolate chips and nuts or coconut.
- Serve immediately.